Oh…..well hello there Dr. D fans, welcome back to the blogohood. *Takes off a nice sweater* I am glad you could come here so we could talk about another painting article.
Ok, we are done with that bit. You knew it was coming. You knew this large, grey, angry, surprisingly intelligent depending on the comic-book writer, costumed man was coming up. So grab your little paints and your littles brushes because we got a big, angry man who needs some color.

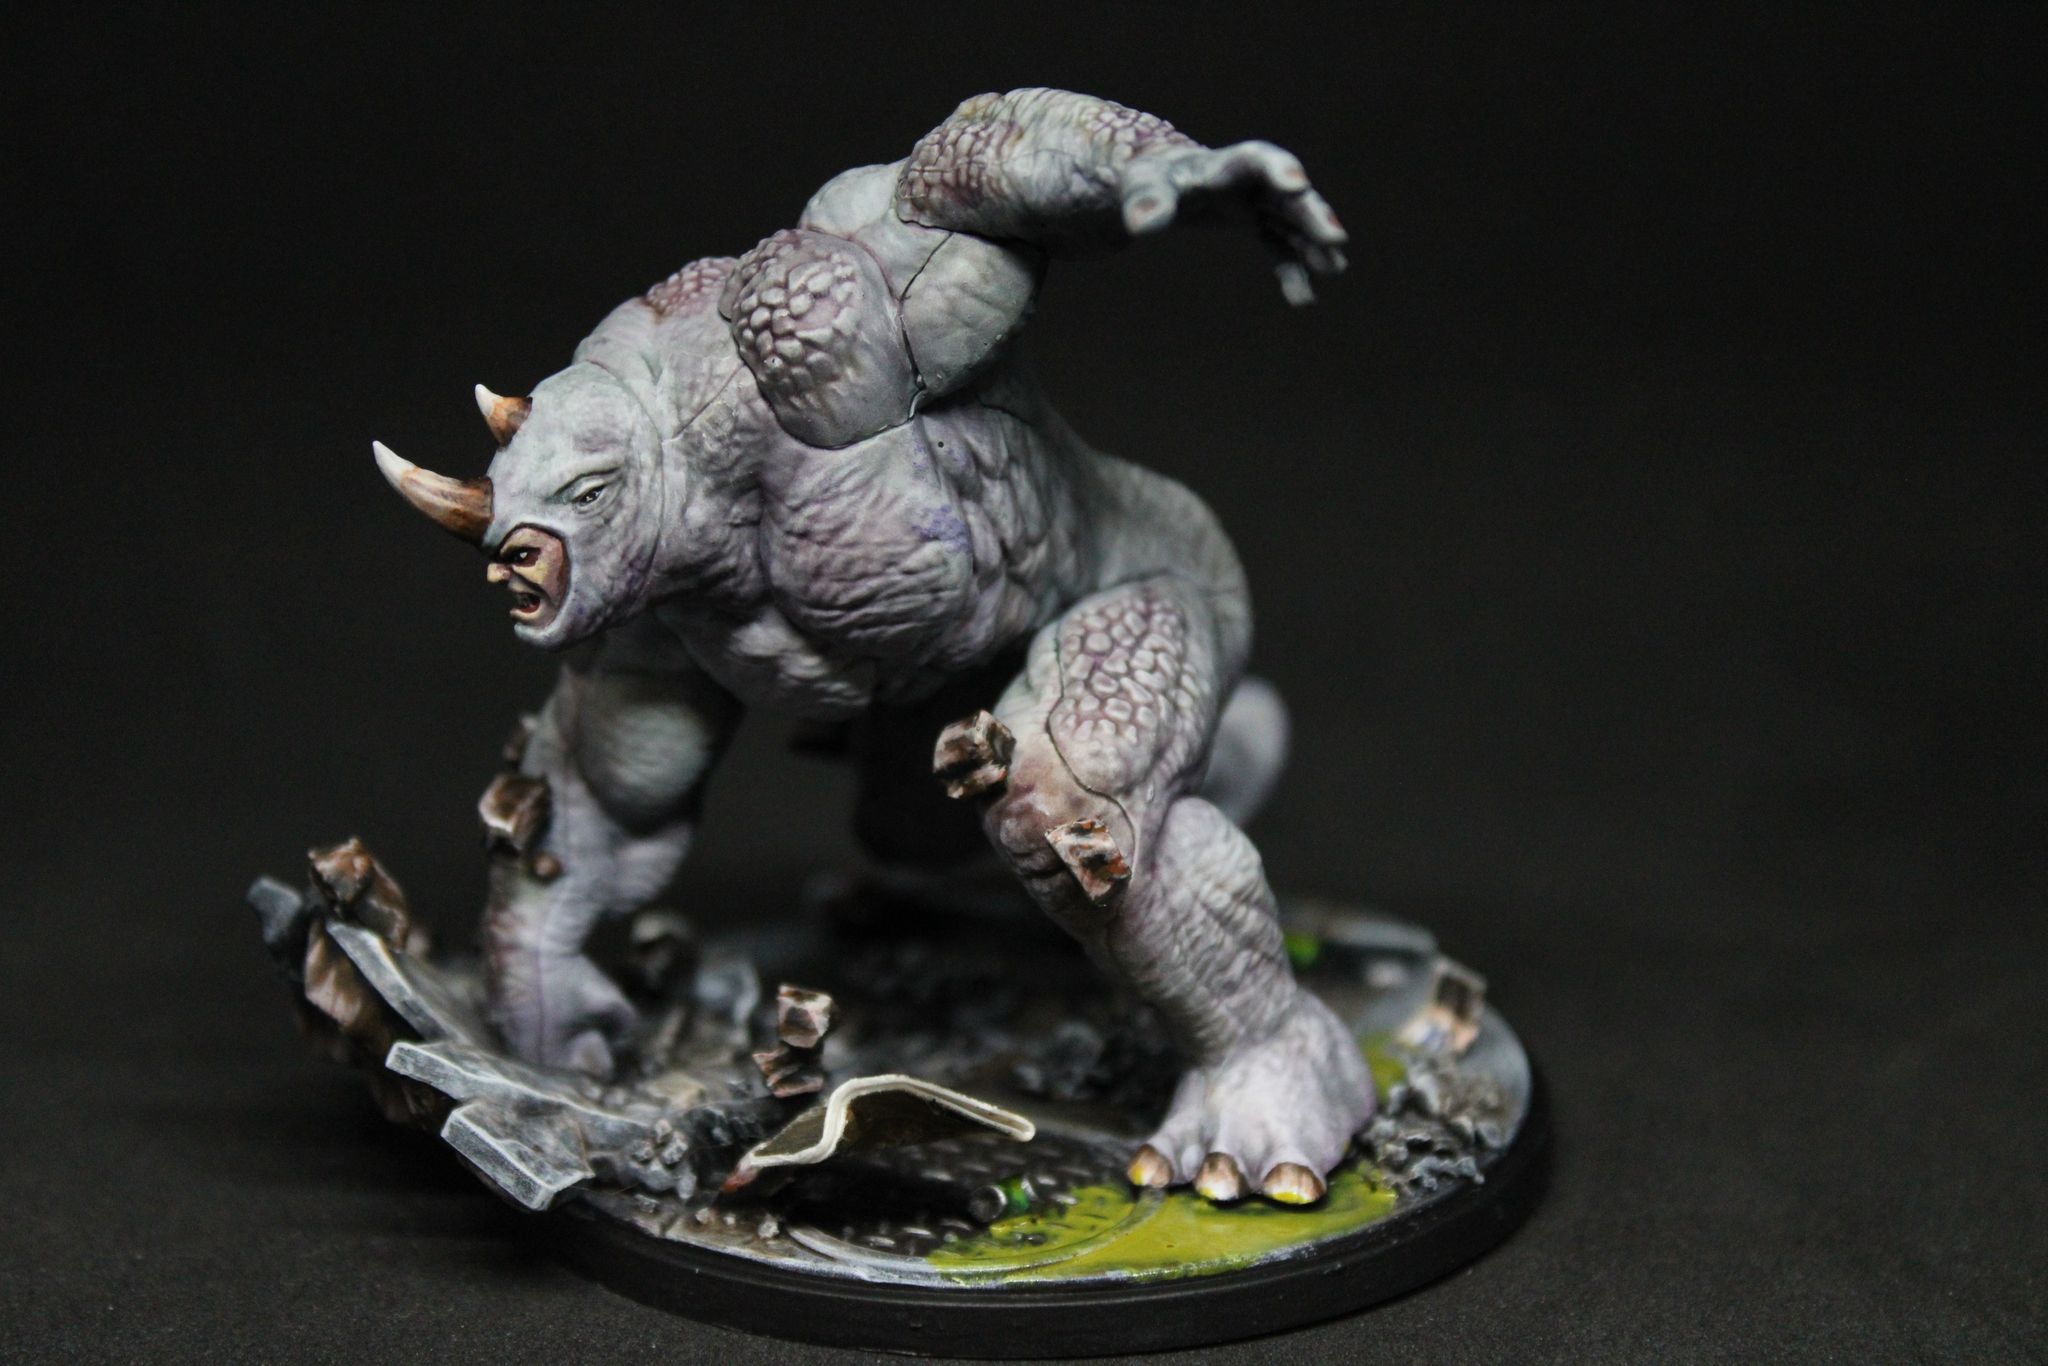
As usual, we need a model to paint. Rhino was nice enough to just come in a box containing himself, the artist formally known as Rhino, and a bunch of neat tactics cards. At least that is what was in mine after I used the code PCME10 when I got to checkout on Bearded Dragon Games. After that I pulled out some paints and my tools and I got to work.
Warning, this article is going to contain use of an airbrush. I usually keep these tutorials airbrush free since I know that not everyone has one available, but this model is an airbrushing dream and I had to bring one up eventually. The one thing I will always tell people is that anything an airbrush can do, a normal brush can do. The biggest difference is going to be the amount of time it takes to replicate the airbrush’s smoothness. Due to Rhino canonically just being a big slab of grey, I knew this tutorial was going to be an experiment in making a single color look interesting. This is something perfectly suited for acrylic inks and contrast paints. What we overview here is going to be easy to apply to other models that are mostly one big color, so its a good idea to learn the theory as well as the practical of this paint job.
I hope you enjoy this tutorial even if you are just here for the humor since that is the only thing keeping me together these days.
Here is a lovely little list of the products I used for this tutorial. The inks can be picked up at most art or hobby stores since it is used for easel painting. You might be able to find alternatives easily enough in other companies as well.
- Citadel (GW) Russ Grey
- Vallejo (V) Pale Grey Blue
- Monument Hobbies (MH) Bold Titanium White
- Daler Rowney Purple Lake
- Daler Rowney Burnt Umber
- GW Contrast Medium
- GW Space Wolves Grey Contrast
- GW Skeleton Horde Contrast


I decided to add in a little FLAIR to the model with some flying rubble. This was very easy to do with just the random stuff you have laying around your home. I took some sprue from a GW model kit since I was working on some personal projects, but you can use any kind of hard plastic. I chopped it up until it look like a piece of rubble and then glued it in places that made it look like it was flying away from the impact site. This model is really great in that regard since it makes doing interactive effects like this easy peasy. Then I went int and glued some of my rubble mix to the base to help give it texture.


So after you stare at how big of a boy this model is, it is time to get started. Every great journey must begin with a simple step and its best to just focus on one thing at a time. I primed Rhino black since I knew I wanted to work up from the a dark base to get the most contrast. This entire tutorial is going to be about getting different values out of the same color over a large surface area. This is very difficult to pull off if you don’t know how to do it, but it is very easy once you get the basics. Painting colors like this can be done a couple different ways, and some people may think I went about it the wrong way, but poo on them because I have never done a single thing wrong in my entire life.


Next I took out the ol’ airbrush and sprayed most of the model with (GW) Russ Grey to give it a grey with a blueish hue. This is going to be very helpful at making sure the grey does not become flat and boring once we get to the highlights. I made sure to leave the deepest recesses a little more dark since an airbrush gives you an opportunity to really control the amount of paint coverage on specific areas of the model.

Next, I took the (V) Pale Grey Blue and did the exact same thing but stuck to areas that light would most likely hit. I am not a lightologist so I don’t think about it all that hard. It mostly just comes down to wherever I want more visual interest as long as it looks like a place light could conceivable hit the model. Don’t agonize over it and just hit the areas that you think should be brighter. My thinking was tops of muscles, them buns, and around his neck and face to make sure we keep to the mantra of bringing the eye up and towards the center or face.


Next, we take some of that wonderful (MH) Bold Titanium White and do it all over again. This time we cover even less of the skin and make sure we just hit the tippy top of the muscles we want to brighten up. Make sure you hit his head and his chin. For some reason that chin almost escaped my noticed since it juts out so much. With how much leaning this guy is doing he is going to need a chiropractor after every single game.


Now we enter the most important and tricky part of this entire process. We need to create the undertones of the hide for the model. These undertones are going to be used primarily to illustrate the textures of his hide. The level of coarseness changes all over the model and this gives us a perfect opportunity to create some visual interest. As a real doctor on TV, I know that the most calloused areas of the body are going to be large joints (Knees, Elbows) and areas that are exposed to the most touch from the outside world (Fingers, Outside Part of Forearm, Feetys). When you think of colors that indicate how coarse something is I tend to think of brown. Now this is a comic book character so we are going to greatly embellish exactly how this works. So, if you think you ruined your model when you apply the paint I only ask you to hold on since its going to look very strange at first.
Now that we are approaching the model with a plan we can begin to start ruining our pristine model in the name of SCIENCE!! The coarsest areas of this model are going to be the elbows and the knees. The calloused pimple looking things on the model could also be treated this way, and I bring that up later, but I wanted to use a different brown for those areas. I airbrushed some Daler Rowney Burnt Umber to those areas. It was very quick and and I admit I sorta scared myself with what I was doing, but I remembered that we need to paint without fear. I am alot of things, but dishonest is not one of them.
I just screamed internally.


The interesting thing about real life skin is that it is the victim of everything that is underneath it. Something to keep in mind is that the presence of blood technically colors your skin since it is literally everywhere in your body. We don’t really need to get super technically with it, but it is interesting to think about when it comes to shading models with alot of skin. In the case of Rhino we are going to use Daler Rowney Purple Lake to sorta simulate blood in areas to break up the grey and white. This purple is very powerful and you want to make sure you are careful with your placements so that you don’t ruin the model. The good news is that I have a great example of me spilling ink all over the back of his right foot later, and even I managed to save it with some wiping and proper drybrushing. So if you put too much on the model, RELAX, don’t panic.
I used my airbrush to lightly tint areas that I wanted to slightly change. If you are using a brush the only thing I will suggest is you want to use your ink like a glaze and avoid trying to use it as a wash. It will create a mess. The ink’s surface tension is very low and will very likely start to run in all kinds of directions if you are not careful. Just be nice and gentle when it comes to applying this paint. You are looking to tint the white skin underneath. If you go in too hard, you are going to paint it purple and that is not what we want. That would just be a big goof up.


So, this is the one I was kinda unsure on. I wanted the calloused skin pimple areas to be a different color to break up the evenness of the skin even more. I wanted something brown, but not as brown as the elbows. I eventually decided on a boney color, and thought that a contrast paint would be better to get into the cracks of the pimple areas. I used some (GW) Skeleton Horde Contrast and applied it with a brush on the raised bumpy areas. If I noticed the contrast wanted to run off I just pulled it away with a dry brush to keep it tidy.
I won’t lie and say that I was super confident at this stage, but I knew what I was aiming for and hoped it came out how I wanted it near the end. If you think we ruined a great model with all this extra poking with watery paint, just hold on and prepare your buns for how we bring it all together.


The delicious texture has truly appeared with our undertones, but the rest of the untouched skin is still very flat. I decided to wait until this point to do this so that all of the areas we just tinted can be brought together with a single color. I pulled out some (GW) Space Wolves Grey Contrast since it had a similar blueish tint as the Russ Grey we based the model with. I then soaked the model in it from head to his little toe beans. I mixed the contrast with some (GW) Contrast Medium at about a 75:25 medium to contrast ratio. I wanted the paint to go into the cracks, but not destroy all of the work we just put in. Again, I applied all of this with a brush and just took the time to make sure it was applied evenly.
Just make sure the paint doesn’t pool or start running in places that you don’t want it to go. If you get too much pooling you just go in there with a dryer brush and soap it up like a biscuit in gravy. (That’s something we do in the southern US)


The model is really coming together and I am starting to feel much better about how this might all turn out. I decided I wanted to go back in and put some more purple in the big joints to establish the blood idea and keep those areas interesting to look at. This was a personal preference so you might be able to get away with not coming back with the inks.
This is where my right hand decided to betray me! He knocked over my bottle of Daler Rowney Purple Lake and made a mess all over my desk and splashed ink onto Mr. Rhino. Thankfully, it was limited to his feet and I was able to clean up most of the areas before I let it run all over the place. It did make me very upsetti sphagettie since I was thinking it had ruined the model, but I decided to turn that frown upside down and look at it as a challenge. I cleaned it up as best I could and hoped that the next step would bring it all together.


Now this is the moment that boys become men! I grabbed one of my fanciest drybrushes, bite down on a piece of wood, and pulled out my (MH) Bold Titanium White. I put paint on the brush and I wiped as much of it off as I could on my construction paper. I then started drybrushing the entire model as gently as I possibly could. The point of this is to reinforce the idea that this model is grey/white, but you want all of that delicious work we just did underneath showing up in subtle ways. This means you have to be calm and patient while you are dry brushing. If you go into this with a heavy hand or an overloaded brush you are going to just cover up all of your hard work.
The fun news is that I was a little more heavy-handed on the back of the right foot and it did indeed fix the purple spill issue. This means that if an area is too heavily tinted you can repair it with a little more heavy dry brushing. This is the point where your personal preference is going to reign supreme.


And that is how I painted the skin of a large man in a rhino Halloween outfit. This was a model of experimentation and I think you can apply it to a lot of very large models like dragons and mystical animals. The inks and contrasts are very good at giving you the ability to slightly change the colors that you put onto models. This helps break up something from looking flat and boring. This is especially helpful if the entire model happens to be a single colors. The inks can also help tell the story of the model.
I had a surprising amount of fun painting this big lug, and I suspect you will enjoy it as well as long as you just let yourself have some fun with it. I secretly dislike painting anything bigger than the average sized person in all the games I play until I reach the point where I am just throwing colors at it until I find something that sticks. With models like this you are going to be looking to enter “the zone” as you just start going with gut feelings. Just start taking steps and eventually you will be done before you know it.


Well, it’s that time again lads and ladies where I must bid you adieu. I really enjoyed painting this big hunk of meat and anger issues, and I really hope you enjoyed tagging along with me. You guys are the reason I do this and every single thing, good and bad, that you say means alot to me. I love talking shop and I hope you guys like to look at it!
Lets just say that I see a very diamondy shimmer in the distance that has been giving me some of that sweet, sweet inspiration that I so love. With the next guide you might be able to make your next paint job shine like a diamond.
Reach out to me on Discord at Dr. D #4340 or Furypainting@gmail.com if you have any ideas or suggestions for what you guys want me to rant on about in the future.
KEEP IT POPPING GUYS!


Leave a Reply