Hello all you very attractive word readers out there!
Dr. D here to tell you about my journey into the Worthy put on by the wonderful people at AMG. I didn’t think I was going to enter it this year, but I was lucky enough to get hit by some inspiration about a month before Adepticon 2023. Anyone that knows anything about me should know that I do not read X-Men comics, but I have a personal love for Emma Frost. My personal fascination comes from the fact that she is a very strong, independent, and quiet frankly bad b***h from the state of Massachusetts.
Marvel recently started a comic storyline called Sins of Sinister and they did an alternate cover of Emma dressed as Sinister for the first issue. If this new look had story implications, I had no idea. I just knew I loved the look and wanted to see if I could win a shiny coin with it. I am a simple man, if I see Emma on something I throw money at it. If that is wrong then I really do not want to be right.

I love Emma Frost and Mr. Sinister is a really well-crafted villain aesthetically. Anyone who is even vaguely aware of who he is knows exactly what he looks like. That tassel cape thing is very iconic of the character and will immediately bring him to mind when you see something like it. The art has her in a snowscape scene with some rocks in the background. This creates an interesting problem since the entire scene could easily just be one big white blob with no definition if I don’t have any intention behind my brush strokes. A fellow hobbyist that I very much respect, and currently only winner of my Painting Gallery with No Name, JonBW said I should try and do some special UV resin work to give the model some kind of mindpower thing. I knew it wasn’t a great idea to do this for the very first time on a competition piece, but I had to admit I was enamored with the idea so I decided to give it a shot.
Now, spoiler time. I did not place at all for the Worthy, and quiet frankly, I really didn’t think I would. This was my first TRUE competition for model painting that wasn’t just a smaller local con or a best painted at a model gaming tournament. I knew I was going to be in a “big fish in a small pond” situation once I stepped up to this level of competition. I think this article will be an excellent way to see how I approached it knowing that I was not likely to win, but shows you can get more than a medal out of doing stuff like this. I got a super swanky model out of it and learned where I needed to improve in the process. This goes to show that perspective really is everything. No matter what your skill level, you can enter these things and still hit goals that mean alot to you. We just have to make sure we follow the rules and mind our Ps and Qs since we are dealing with the higher powers. We do not want to make them angry at us or they will visit the plague of a thousand grey models upon our household.
With all of that aside, lets start building Emma Sinister!
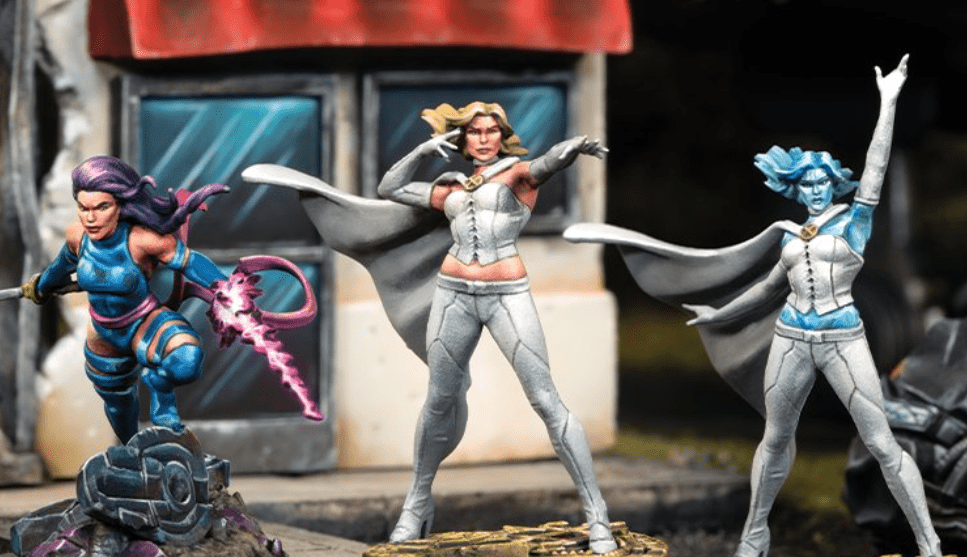
So, our model has to be built out of AMG model kits and and sculpting materials. That’s going to be pretty easy given the Marvel Crisis Protocol Range. I decided to build my model out of a Mr. Sinister and Supergaint with a head from the Emma kit. I actually did order these kits from Bearded Dragon Games and used a code called PCME10 at checkout and got this really nifty discount. Ironically enough, members of the podcast were there at the shop when it was getting packed, and they had no idea what I was planning at the time. Talk about a small world.
The Supergiant body is a very good looking female form piece that looks like something Emma would wear if she decided to go Sinister. The Sinister kit is the only place on the Earth that you can get that weird cape so that was a given. Emma’s face should probably look like Emma, so lets not reinvent the wheel on that one. For the base I knew I was going to want a rocky snow scene so I pulled out some cork board and my ol’ trusty basing mix.


With the pieces cut out and my fingers still attached to my hand it was time to start building Emma. This would be the point where I would see if this entire thing was even possible. I had never bought the Mr. Sinister kit before so I had no idea that boyo’s shoulders were a part of the cape bit. Mr. Sinister’s chest press PRd are CLEARLY significantly higher than the slender Emma, so I knew this whole process was going to require some cutting.
My personal rule of cutting up models for conversions is to make sure you cut LESS instead of cutting MORE. You can always keep cutting if the pieces don’t match up just right, but once you cut TOO MUCH, you potentially wasted alot of money on the part you specifically bought a kit for.
Let me tell you from personal experience, that this is VERY FRUSTRATING! This could potentially increase the cost of the build as well due to the high demand of fruit snacks your brain needs to get over the RAGE!

Next, I wanted to make sure the cape would match up with the neckline well enough. I used some blue tack to put the arms in place to make sure that they were not going to need to be completely modified due to my subtle changes in position. At this point all of the things I was doing were purely theoretical due to the lack of a instruction manual. I needed to make sure all of my cuts and alterations would work for the overall model. If I cut a piece a certain way without taking the entire model into consideration I could potentially get myself into alot of trouble with the positioning of the finished model.

I knew from the Supergiant pose I wanted her stepping down from some kind of higher elevation so that I didn’t need to cut up the entire lower half of the model just to give her a more static pose. I pulled out the blue tack again and got some vague positioning so that I knew roughly what the end positioning would end up looking like.
I cut off the Mr. Sinister shoulders from the high collar to put it around the new Supergiant shoulderline and neck. The tassel cape was already in position and I knew I was going to be able to fill any gaps that came from the build so I didn’t stress too much over a perfectly flush meet. This required an obnoxious amount of cutting and smoothing to get to work correctly, but it was very much worth the effort. As you can see the model now has a profile that is starting to look like the model we are after.

The last part of the actual model would be Emma’s head. The actual Emma Frost model has her hair being blown backwards. This obviously wasn’t very conducive to this model so I knew I was going to need to cut alot of that off. This meant that we were going to have to sculpt some texture that would look like hair. Not too difficult thankfully, but something to keep it mind when it comes to the amount of time we have to finish this model.

Getting to it, I cut the back part of the hair and shaved the neck until it reached a point that was flush enough with the rest of the model that I was happy with it. At this point I was using blue tack and some glue to try and fill the larger gaps that would be formed from the minor positional adjustments I was putting into the the model. I also started to make the collar smaller by slowly slicing up from the bottom of the collar to make it less tall. This collar was the most difficult part of the build due to the shoulders needing to be indented into the collar so that it didn’t look unnatural. The odd proportions of the collar could easily ruin the illusion of the model. This entire process was a great thinking exercise on how to change things from a male frame to a female frame.

Now I knew that doing all of this cutting and slicing was going to cause some gapping. In this situation oddly enough, the cutting was not only meant for the model, but also to make sure my hands experienced the loving kiss of a sharp blade. I have decided that it is time to get serious and settle down with the sharp hobby knife that I have used since high school.
Please look for a wedding invitation in your mailboxes in the next few months.
To help with the gapping I used some Heavy Gloss Gel to start filling in the gaps. I personally despise liquid green stuff, and my two-part green stuff was reaching a age where it would run out of my office to tell kids to get off of my lawn. And I never trust anything that cares about their lawn flamingos more than the local kids. The gel was a nice material and I had some ideas on how to handle any imperfections that could form while it was drying. The gel was also an excellent material to do some light sculpting for the hair texture and would smooth nicely with a file later on.

At this point I was very happy with where I was in the process. Emma was for the most part done and ready to start getting consensually slapped in the face with paint. My time limit was continuing to dwindle since I would have to stop for the night every time I did something that required something on the model to dry.
Thankfully, whenever I did something that needed to dry I would work on the base. My hope was to have everything finish around the same time. Its like cooking a meal for your loved ones. You make sure you talk a big game and when you realize that you are out of your element you get to enjoy the comfort of sleeping in the yard with your lawn flamingos.
We call that kind of joke a callback.
I didn’t take pictures of the entire process since I am silly and forgot to pull my camera out. But all I did was stack more cork on top of the previous layer of cork until I was happy with some of the interesting height changes. I then covered it with some superglue and sprinkled some sand with chunks of cork pieces. I have used the same jar of “basing stuff” for probably about 5 years. It is a mix of sprue shavings, sand from a Massachusetts’s beach, and little bits of cork shavings. I have always thought that the mix gives bases JUST enough texture to make it more interesting and fun to paint.
The base was now functional, but I thought it was still boring. I wanted to add some more story element to it, and bases are just a fantastic way of doing that. I painted the bases with some dark browns, blacks, and some pale grey blues and go to work on special effects.
My brain said if it was going to be snowy I had better put in some form of ice. Heavy Gloss Gel was again my weapon of choice, but building it up and shaving it would have been a month long process in frustration. So, I had an amazing idea from the amazing Terrain Tutor. Using clear rods to give the gel some added structure.

I took the rods, chopped them in half, and then glued them into the part of the base that had a little more negative space. I was hoping that this would balance out the “weight” of the model if that makes sense. Emma herself would be more on the right side of the base, and that empty area on the left might look strange. (Just note that this is going to come up later in the next article.)

At this point I knew that the biggest parts of the model’s construction were finally finished. Emma was built and ready for paint, the base was painted and awaiting the loving touch of some special effects, and I was feeling good about my time constraints. Honestly, I thought the model was coming along very well. I felt confident that the model would be finished and would be impressive enough to turn some heads.
I have rambled on too long for a single article so I GUESS I will have to go over how I painted this whole thing in the next article.
Reach out to me on Discord at Dr. D #4340 or Furypainting@gmail.com if you have any ideas or suggestions for things I can ramble on in the future. I have full intention to start doing more hobby related stuff in the near future going beyond this blog so keep your eyes open for that!
In the meantime guys, KEEP IT POPPIN!


Leave a Reply